
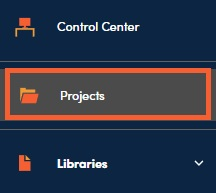
1. Select Projects on the left navigation panel.
2. Navigate to the Projects grid and click the + button above it.

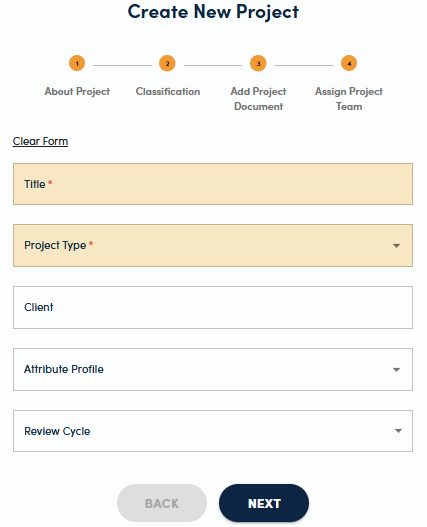
3. In the Create New Project pane on the right, a multi-step wizard will be displayed. Fill in the fields associated with the project. Mandatory fields are shown with an asterisk * and highlighted in yellow.
📋Tips:
- The Project Type field refers to your predefined approval workflow. Refer to the administration training materials for more information on how to set up workflows in your site (Content Setting Administrator access is required to do this).
- Review Cycles are typically used for recurring questionnaires such as DDQs.
4. Click ‘Choose File’ to browse or drag and drop the Excel document to select it. Check off Autofill and Generative AI.
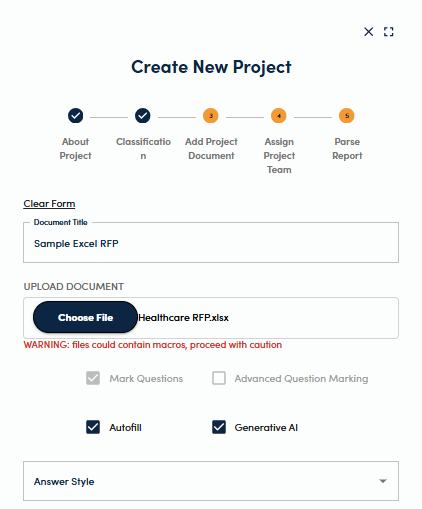
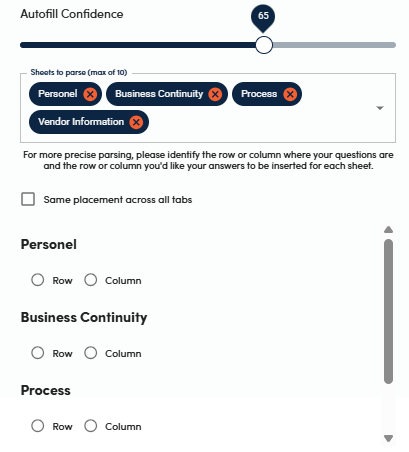
5. Select the tabs in the questionnaire that you would like to complete as well as the location of the questions (row or column) and the location of the drop down selections (row or column).
6. Select any GenAI Folders that you would like the system to use in answering questions, in addition to your knowledgebase.
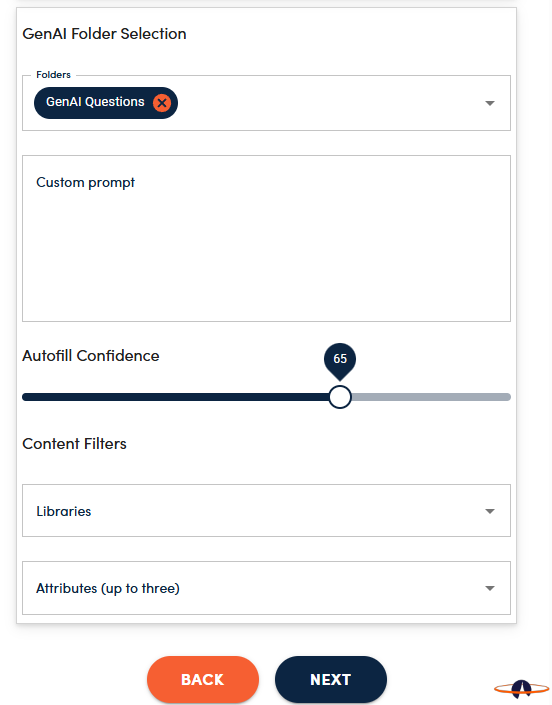
7. Select the Confidence threshold that you would like RocketDocs to meet and exceed when inserting responses.
8. Lastly, apply filters on Library, plus up to 3 other attributes, if you would like RocketDocs to use something other than all the content that you have access to in you knowledgebase. Click Next.
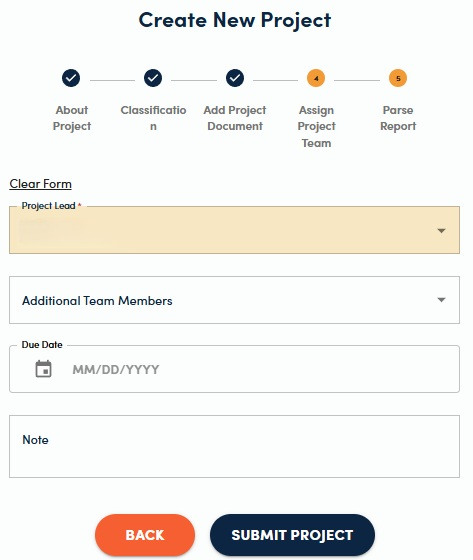
9. Team members should be people that will be working on the RFP but should not include SMEs. Users added here will typically receive a notification that they have been added as part of the project team (unless this notification is disabled in Notification Settings). Fill in a Due Date, any additional Notes you would like your teammates to receive and click Submit Project.
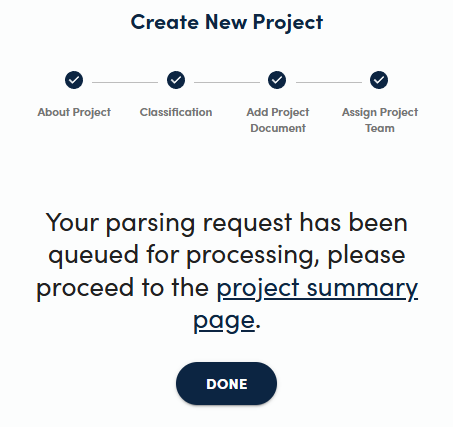
10. Click on the Project Summary Page hyperlink to bring you to the project page for the project.
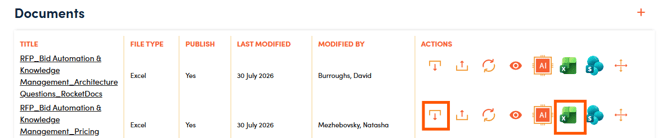
11. Click on the AI button next to the uploaded document to follow along with the autofill progress and to see the result once the questionnaire draft has been completed.

12. If your questionnaire does not have a comments or narrative section proceed to Section 12.
13. If your questionnaire also has a section for comments or narrative responces, you will need to download the project document you just finished parsing, by clicking on the Download button in the Documents Grid and upload it again as a new project document, by clicking on the plus sign above the Documents grid.
📋Important:
Repeat steps 4-9. When selecting rows/columns you will need to select the same column for the question and a new column for the location where you would like narrative responses to be placed.
This time you can select Autofill or Autofill and GenAI, depending on your preferences.
Autofill will pull in just responses directly from your knowledgebase and GenAI will try to generate responses for anything that was not answered directly from your knowledgebase.
14. Once the question identification/autofill/generative AI process has finished, click on the Download icon next to your project document (you will need to do it on the second document, if your document has a drop down and a narrative response section) to work on the questionnaire in the desk-top version of Excel or on the Excel icon to work on it in the web version of Excel. The web version of Excel allows for coauthoring (multiple writers working in a project document at the same time).
15. Once your document opens, click on the RocketDocs icon in the top right corner of your screen to log into the LaunchPad. Contact your RocketDocs administrator if the icon is not available.
