
We are pleased to announce the RocketDocs 2.72.0 release, is scheduled for September 29, 2026, during the standard maintenance window (8:00 PM – 11:00 PM ET). Brief service interruptions may occur during this period.
This release introduces two significant updates:
-
Content tag visibility in the search grid.
-
A powerful new Embed Content feature for connecting information across records. Each update is designed to improve your daily workflows and reduce time spent on repetitive tasks.
For the video demo on these features please see below:
Content
Tags in Search Grid
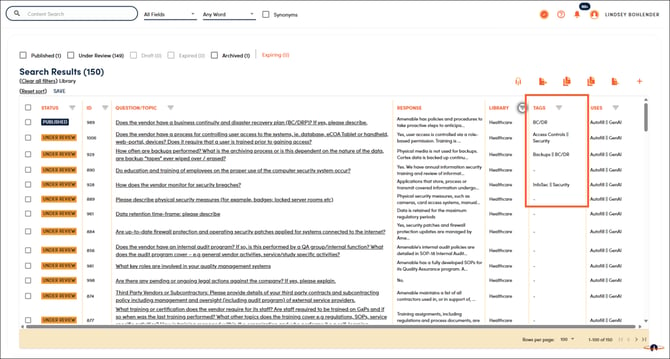
Content managers can now filter, sort, and export tags from the content search grid. This enhancement makes it significantly easier to locate and organize content by the tags applied to your records. Note that you are able to right click any tag in the grid to set a quick filter for that value, or select multiple tags from the filter list by clicking on the icon at the top of the column. Tags are available for export, but cannot be imported at this time.
Embed Content
Keeping the same language accurate across dozens of content records used to mean editing each one by hand. Now you can maintain a single authoritative version and reference it wherever it's needed.
The new Embed Content option in the lets authors pull a source content record directly into another record. Instead of copying and pasting policy language, disclaimers, or ESG statements into multiple contexts within your content records, you point to one source and let RocketDocs do the work. When that source changes, every record that references it updates automatically.
The benefits include:
- Reducing manual updates across multiple content records, saving time and potential missed changes
- Stronger search and AI matching since the combined text is used
- Fully rendered previews with embedded content included
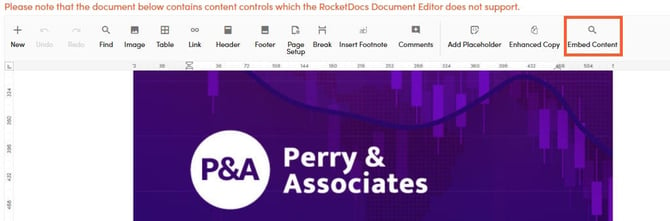
1. In the Document Editor, click on the Embed Content button to add or remove embedded content records.
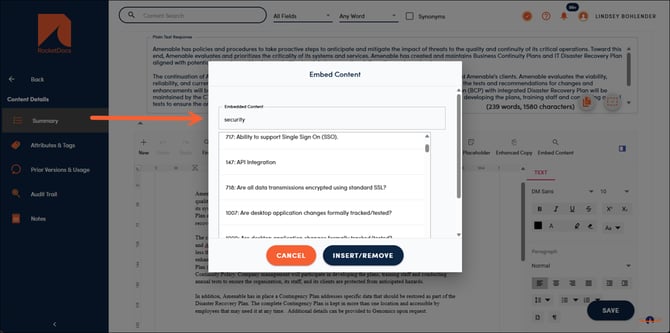
2. Search by keyword or content ID for the record you want to embed and click on the record(s) you want to add.
3. Click Insert/Remove to save your changes and insert the placeholder for the content record(s) you selected. You will now see the content placeholder in the response, and a message indicating that this record has embedded content.
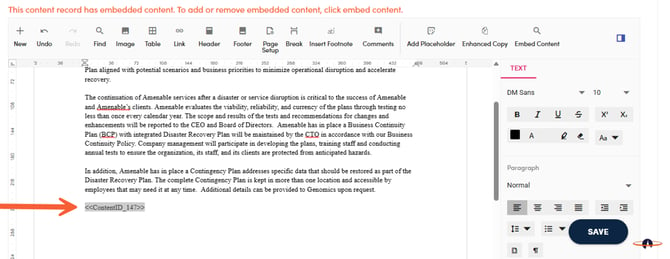
4. Copy, insert, or preview the content record as you typically would and note that the embedded content is inserted.