
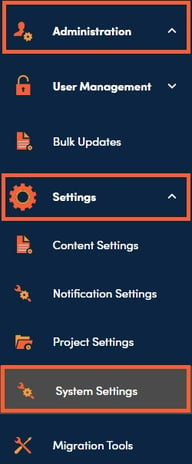
1. IP Whitelisting is accessed by clicking on Administration, Settings, then System Settings.
2. IP Whitelisting is turned off by default to prevent accidental lockouts from the platform. To turn IP Whitelisting on in the application please contact RocketDocs Support at support@rocketdocs.com and request that IP Whitelisting be enabled.
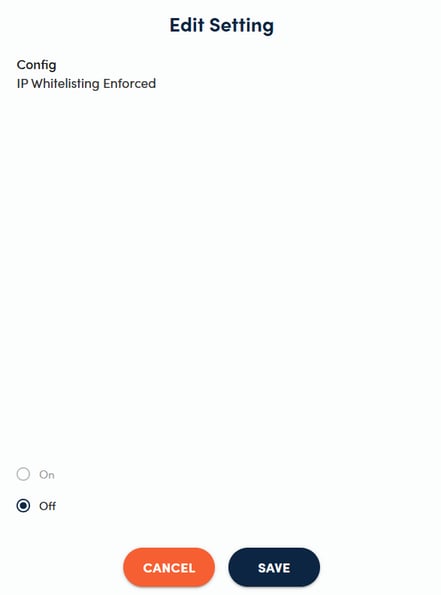
3. Once IP Whitelisting is enabled in RocketDocs, a range will be added by default of 0.0.0.0 – 255.255.255.255 to allow all traffic. This range can be removed by the system administrator once all IP addresses have been added. Navigate to Settings>System Settings>IP Whitelisting and toggle the option off at any time if IP Whitelisting needs to be turned off.
📋Note:
A request to RocketDocs Support will need to be resubmitted for IP Whitelisting to be turned back on.
4. Click the pencil next to IP Whitelisting Ranges to edit the ranges.

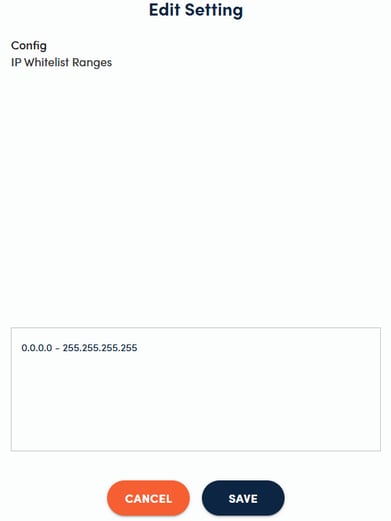
5. Once the side drawer opens, the IP ranges can be added. Ranges must be added in the format: 0.0.0.0 – 255.255.255.255. All IP ranges must be separated with a hyphen.
📋Note:
To set a single IP address the start and end range must be the same (Example: 0.0.0.0 – 0.0.0.0). To add another IP range, all ranges must be separated with a comma.
6. Once all ranges are added to the list, click Save.