
Navigate to Administration, User Management, then Users, on the left side panel.
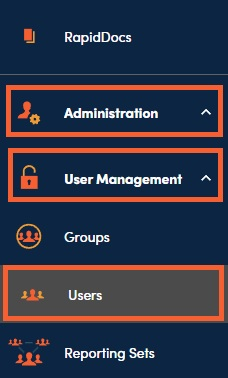
Click the Export button and select csv.

Delete all rows except the header (though you may want to leave one row until the right before import to be able to see acceptable formats for each column).
Do not add, remove, reorder, or rename columns.
Fill in file with your information prior to performing the import, following the specific field instructions below.
Please note that, if a user with the same email address exists in the database, or in the file, you will receive an error for the duplicate line.
Click Import button (next to Export button, in screen shot above). Select the updated csv file.
You will receive an email with any import errors or letting you know that the file was imported successfully.
Field Instructions:
-
User ID – Can be left blank, this will be a system generated identifier that will be automatically created for each successfully imported user.
-
Email Address – Fill in an email address for the user. The user will receive all system communications at this email address and will also use it to log in to the RocketDocs platform. This field is required.
-
First Name – Fill in user’s first name. This field is required.
-
Last Name – Fill in user’s last name. This field is required.
-
Groups – Fill in group names if you would like the user to be added to any user groups. User group names should be separated by a semi-colon and a space between values. Values are not case sensitive. Groups entered must be existing user groups in the platform. This field is not required.
-
Privileges – The only privileges available to non-Core users is External Files and Generative AI. Privileges available to Core users are: Content Administration, Content Administration Settings, External Files Access, External Request Administration, Generative AI, Project Administration, Project Administration Settings, RapidDocs Administration, Reports Access, System Administration, and User Administration. Privilege names should be separated by a semi-colon and a space between values. Values are not case sensitive. This field is not required.
-
Licenses – License options are: Core and Contributor. License names should be separated by a semi-colon and a space between values. Values are not case sensitive. This is a required field.
-
User Types – User Types options are: Administrator/Writer, Field User, and Read-only User. User Type names should be separated by a semi-colon and a space between values. Values are not case sensitive. This is a required field.
-
Restrictions – Can be left blank, this field is not importable at this time.
-
Last Login – Can be left blank, this field is not importable at this time.
-
Status – This is a required field that will accept values of ‘Active’ or ‘Inactive.’ Values are not case sensitive. This is a required field.
-
Two Factor Enabled – This field will only be on your template if you do not have SSO turned on. If this field appears on your import template, it will be a required field that will accept values of ‘On’ or ‘Off.’ Values are not case sensitive.
-
SSO User ID – This field will only be on your template if you have SSO enabled. If this field appears on your import template, it will be a required field that will accept email addresses and other usernames and ID types. Values are not case sensitive.
Updating Existing Users
You can update existing users by exporting an import template, leaving User IDs in place, and updating the remaining fields using the field instructions outlined above. If the system, finds a user ID that it recognizes, the user will be updated.