Unlock your library anywhere!
RocketDocs Browser Extension enables existing RocketDocs users to access their library content from anywhere on the web. Get ready to experience seamless access to your company's institutional knowledge like never before. With RocketDocs Browser Extension, you'll be able to unlock a wealth of information right from the web. Goodbye to endless searching and hello to boosting your productivity to new heights.
The RocketDocs Browser Extension is set to revolutionize the way organizations operate by making the completion of consultant databases, online proposals and online forms a breeze. We've delivered the powerful functionality of RocketDocs’ Microsoft Add-In to the web, making it effortless for you to navigate and leverage the collective knowledge of your company.
The Browser Extension’s web-based nature ensures that you can access your company's content library anytime, anywhere. Whether you're working from the office or at home, vital information is just a few clicks away. Our step-by-step user guide is below, and here is a quick video walkthrough of this valuable tool:
1. Click the RocketDocs icon under your extensions in your web browser to open RocketVault. Please note that to use the RocketVault you will also need to be logged in to your RocketDocs tenant and also have your webform/portal open in one of the other tabs in your browser.
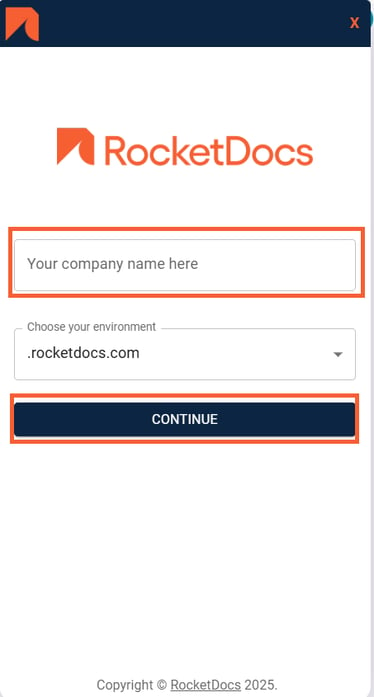
2. Fill in your company name that is used in your RocketDocs URL on the log in screen and click Continue.
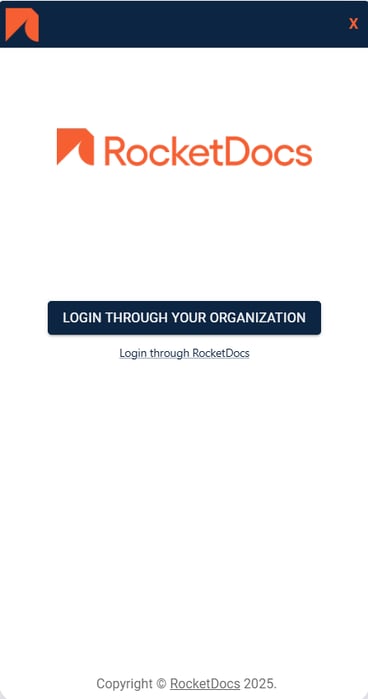
3. If you have Single Sign on you will have two options. If you do not you will just have a direct log in option. Select your preferred log in option.
If you selected to Log in Through Your Organization, follow the steps as directed on screen making sure that you are logged in to your organization’s RocketDocs instance.
If you select to Login through RocketDocs, use your RocketDocs user name and password to log in to RocketVault.
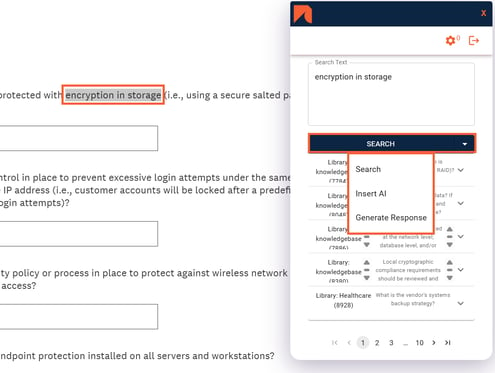
4. Once logged in, highlight the question or the key words that you would like to search for and click on the search menu to select your preferred method of searching.
-
Search - elastic search
-
Insert AI - AI based nearest neighbor matching
-
Generate Response - AI response generation
We encourage users to test the options to identify their preferred method or the method that works best for them.
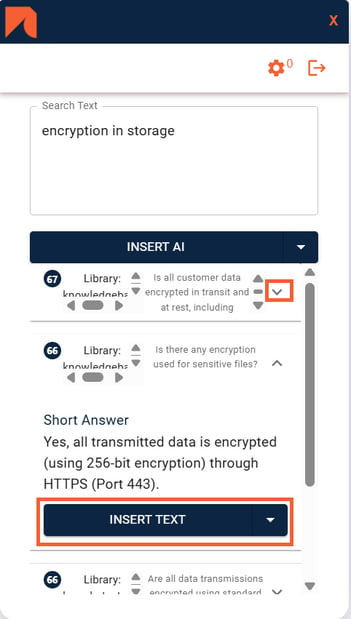
5. Expand the responses in the results until you identify the response you would like to use. The place your cursor in the location that you would like to paste your response and click Insert Text.
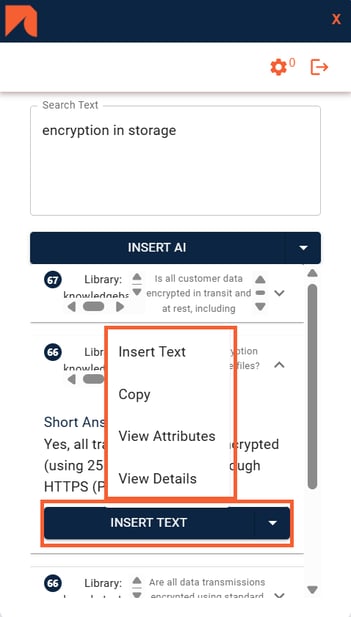
6. The insert text drop down also has several other option available, including copying the response, viewing attributes (to get a view of some high level attributes), and view details (to bring you to the content details page for the content record in your RocketDocs tenant).
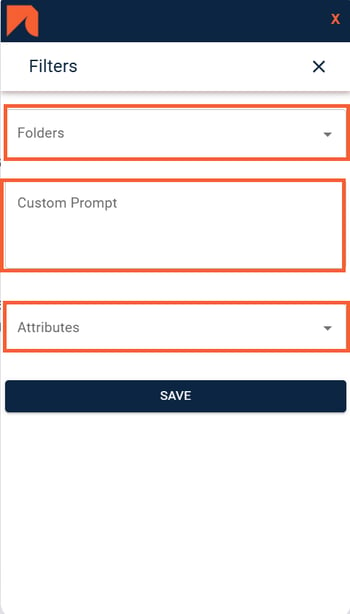
7. Users can further refine their search by adding prompts and filters in Settings by clicking on the gear icon in the top right corner of RocketVault.
-
Folders - allow users to select one or more folder from the GenAI Folder Upload module. Only information from folders explicitly selected in the drop down will be used to generate responses.
-
Custom Prompt - allows users to customize the responses generated by including directions like length or tone preferences. Examples include "Keep responses under 50 words" and "Use plain English for a non-expert."
-
Attributes - allow the user to narrow down the subset of content used to find a response in your knowledgebase or generate a response.
Once the preferred attributes are selected, the user will need to select values for each attribute that they want to filter by (see second screenshot below).
Click Save.
Filters will remain in place until they are removed or modified by the user.
Add Content
Users can now add content directly from RocketVault, by following the steps below:
1. Select a question from your web form, it will appear in your Search Text box.
2. Click into the Search Text box in the RocketVault.
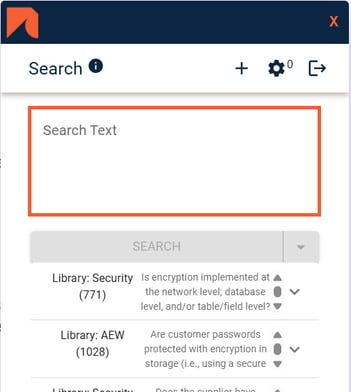
3. Click the + at the top right of the Search Text box.
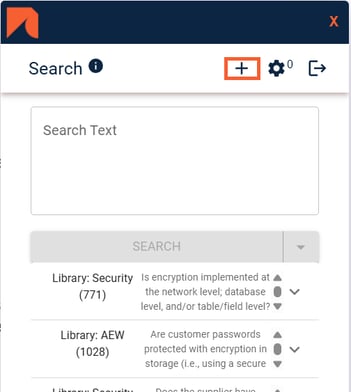
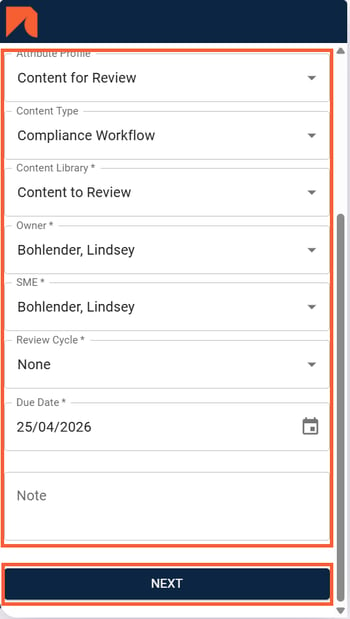
4. Fill in the attributes and click Next.
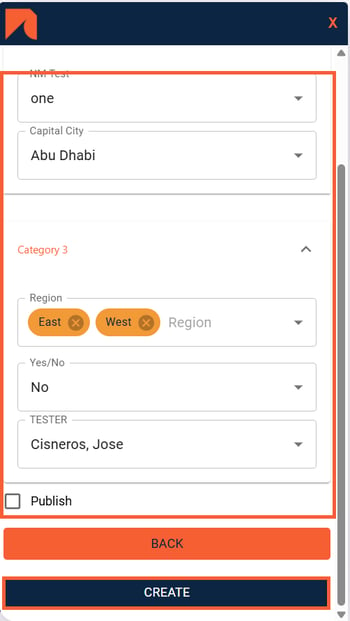
5. Fill in custom attributes on the next side panel and click Create.
📋 Note:
The Publish check box in the screen shot above is only available to users with administrative privileges. Checking off the Publish check box will automatically publish the created content record, without putting it through the workflow review process.
Suggest an Edit
Users can now Suggest an Edit to the SME or Owner of a content record directly from RocketVault, by following the steps below:
1. As you are searching for a response, find one that needs to be updated, has an outdated figure or contains a typo.
2. Select Suggest an Edit from the drop down below the question.
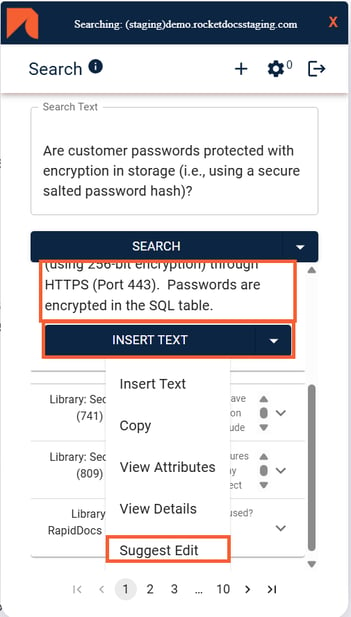
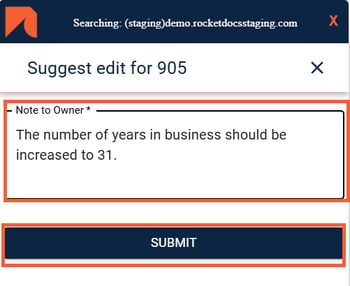
3. Fill out a note for the Content Owner and click Submit. The Content Owner will receive your suggestion via email and/or in-app notification (depending on your settings) and will be able to make the update or disregard your suggestion.